* * * * *
One of the last things on our giant list of updates to the house was to rewire the attic.
Most of the house had had its old knob & tube (i.e. antique) wiring updated before we moved in, but we knew the attic still needed to be done.
When we got the estimates from the electricians, it became clear that we also needed to remove the existing insulation (a combination of 2" of blown-in cellulose and old fiberglass batting), so that they could see what they were doing more easily. They said we could leave it...but the rewiring would take longer. Given what electricians charge versus what insulation costs, the math easily worked out in favor of removing the existing insulation and putting new insulation in afterwards.
And, even better, we found out that if we upgraded the insulation depth at the same time, we could take advantage of energy efficiency rebates from the state, bringing the overall cost down.
Here are some photos of what the attic insulation and wiring looked like before we started:
Step one, remove all the old insulation:
 |
You can see both the knob & tube wiring, and the old gas pipes clearly now:
 |
Also clear, the guy who installed the sun tunnels didn't do a great job. On one of them, a whole section of the aluminum tube -- which should run continuously from ceiling to roof -- had fallen:
 |
Rather than try to schedule the guys to come back out, I got up there and fixed it myself. While I was up there, I found something interesting -- a bullet:
 |
Step two, replace alllll the wiring.
The electricians took two days to do the entire job. One guy in the attic, and two guys wiring fixtures and switches in the rooms. They do these updates frequently, and have a lot of interesting stories. One of them told me that a few years ago, they found a gas line in an attic that still had gas in it. We were all happy to discover that there was no gas in ours.
Here's one of the gas fittings that connected the gas line to the fixture, and the fixture to the ceiling:
 |
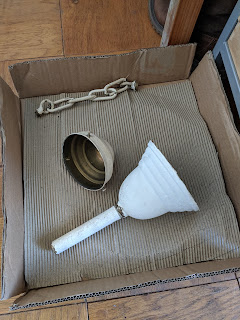
In our case, our cans were actual cans -- decorative coffee cans:
 |
 |
Here is the one in my office before they removed it -- you can see how the gas fitting pokes down through the ceiling:
 |
Ingenuity!
The only other surprise we found was that one of the outlets in my office was still knob & tube, and there are a couple light switches in the garage that are still knob & tube. They did the outlet in my office this time, and will come back later to do the garage.
The fixtures in the bedroom and office were these tulip things from the 70s:
We replaced them with some simple dome fixtures:
The fixture in the hall was a nice brass bell that had been painted over a million times:
 |
I removed the paint:
 |
They rewired it:
 |
The space ships from the living room and dining room each got rewired and put back up (AJ LOVES the space ships):
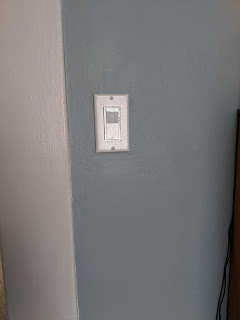
The switches took a bit of rearranging. Here are the switches in my office before they started -- the top one goes to the porch light (which died several years ago...excited to have a porch light again), and the bottom one goes to the ceiling fixture:
 |
 |
 |
The bedroom wall got a little gorier. When they removed this switch:
 |
They discovered this hole and sort of half hole underneath, and also realized they needed to move the switch up:
 |
 |
Having gotten handy with wall repairs doing the kitchen a couple years ago, I was able to patch the holes pretty well:
 |
The other switches were more straightforward. Kitchen & dining room:
 |
 |
 |
 |
Here's all the stuff they took with them when they left:
 |
| Goodbye old wiring! |
 |
| Goodbye gas pipes! |
 |
| Goodbye knob & tube fixture! |
When the electricians left, of course, I had to go into the attic to admire the tidiness there:
 |
Step three, replace the insulation.
16 inches of glorious blown-in, fire retardant cellulose:
 |
 |
 |
Step four, fix up my closet.
The hatch to the attic is in the ceiling of my closet. Somehow, my phone lost the 'before' photo of it, but picture a smallish (16" wide by about 20" long), somewhat jagged hole cut in the lath and plaster, which became increasingly jagged the more the electricians and insulation people went up and down during this project.
I trimmed the hole up, and added a piece of drywall to seal up the smaller gaps and cracks that would have allowed cold air to seep down:
 |
 |
 |
 |
 |
And with the completion of this project, there is JUST ONE MORE upgrade that needs to be done: removing the 25 year old vinyl siding, and bolting the front part of the house to the foundation (for further earthquake safety). I'm hoping we can do that next year or the year after, depending on how quickly we can save up.
* * * * *
To make up for my tardiness with this post, here is a photo of Lolo suffering through the difficult conditions she finds herself in here:
* * * * *
To make up for my tardiness with this post, here is a photo of Lolo suffering through the difficult conditions she finds herself in here:


(🎸 riff) She's crafty!!
ReplyDelete